Expert Support
Mon–Fri, 9AM–6PM EST
Available: Mon–Fri, 9AM–6PM EST
Mon–Fri, 9AM–6PM EST
Available: Mon–Fri, 9AM–6PM EST

EV charger installation costs are primarily determined by your home’s electrical setup, with most homeowners paying between $900 and $2,500 all-in for a Level 2 home charger, including hardware and professional labor. That range covers the majority of straightforward installs, but panel upgrades and long wire runs can push the total well above $3,000. Knowing what drives those numbers before you call an electrician puts you in a much stronger position to budget accurately and avoid surprises. This guide breaks down every cost component, explains the biggest variables, and shows you exactly how to reduce what you pay.
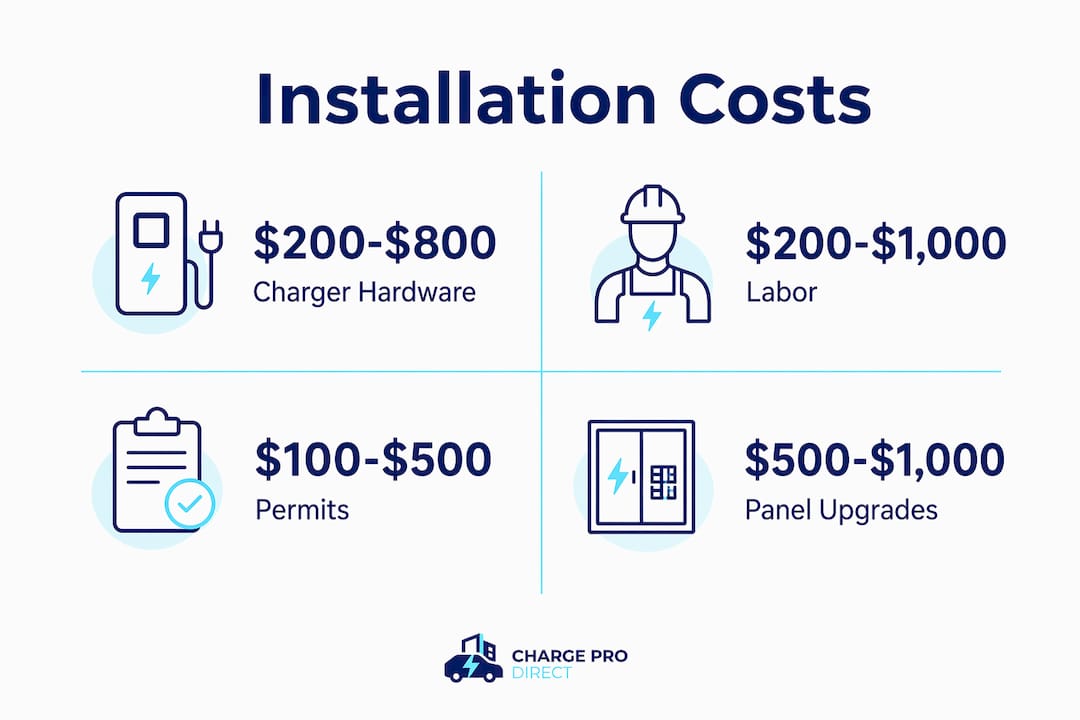
Understanding where your money goes makes it far easier to compare quotes and spot overcharges. A typical Level 2 installation has four cost layers: hardware, labor, permits, and electrical upgrades.
| Cost Component | Typical Range |
|---|---|
| Level 2 charger hardware | $200–$800 |
| Electrician labor | $200–$1,500 |
| Permit and inspection fees | $50–$250 |
| Circuit addition (if needed) | $500–$1,500 |
| Panel upgrade (if needed) | $1,500–$3,000+ |
Hardware covers the charging unit itself. A basic plug-in Level 2 charger runs around $200 to $400, while a smart charger with Wi-Fi, scheduling, and load management features can reach $600 to $800. The charger is usually the most predictable cost in the whole project.
Labor is where the range widens fast. Simple installs take 1 to 3 hours and cost $200 to $500 in labor. Complex jobs involving long wire runs, conduit work, or panel modifications can stretch to 5 to 8 hours and $900 to $1,500 or more. That variability is why two quotes for the “same job” can differ by hundreds of dollars.
Permits are often overlooked in early budgeting. Most jurisdictions require a permit for new 240V circuits, and fees typically run $50 to $250 depending on your city or county. Skipping the permit is not worth the risk. An unpermitted install can void your homeowner’s insurance and create problems when you sell.
Pro Tip: Get an itemized quote that separates hardware, labor, permit fees, and any electrical work. A lump-sum quote makes it nearly impossible to identify where costs are inflated.
Where your charger goes and what shape your electrical panel is in are the two biggest variables in any installation budget. Getting both right before you commit to a location saves real money.
Distance from panel to charger. Heavy-gauge wire costs $3 to $6 per foot, and a 75-foot run to a detached garage can add $800 to $1,500 in materials alone, before labor. Shorter runs mean lower costs every time.
Attached vs. detached garage. An attached garage with the panel nearby is the cheapest scenario, often keeping labor under $500. A detached garage or a charger mounted on an exterior wall far from the panel is a fundamentally different job.
Panel capacity. About 30% of EV charger installs require some panel work, including circuit additions, subpanels, or full service upgrades. That means 70% of homeowners do not need a panel upgrade at all, which is reassuring if your panel is relatively modern.
Circuit addition vs. full upgrade. Most homeowners need only a circuit addition, which costs $500 to $1,500 in roughly 60% of cases. A full panel upgrade is the largest unexpected cost driver, often adding $1,500 to $3,000 on top of everything else.
Load calculation. Before any electrician recommends a panel upgrade, they should perform a load calculation following NEC 220.82 standards. This calculation determines whether your existing panel can actually handle the added load. Without it, you may pay for an upgrade you do not need.
Your home electrical system is more important than any national average when estimating your specific cost. A 200-amp panel installed in the last decade with available breaker slots is a very different starting point than a 100-amp panel from the 1980s.
Pro Tip: Ask your electrician to show you the NEC 220.82 load calculation before agreeing to any panel upgrade. If they cannot produce one, get a second opinion.
Federal, state, and utility incentives can meaningfully cut your out-of-pocket cost. The key is knowing what is available and claiming everything in the right order.
The federal Section 30C tax credit covers 30% of eligible residential EV charger installation costs, up to $1,000 per unit. You claim it via IRS Form 8911 when you file your federal taxes. On a $1,500 install, that credit puts $450 back in your pocket. On a $2,500 install, you hit the $1,000 cap.
State and utility rebates vary widely but are often stackable on top of the federal credit. Many utility companies offer $100 to $500 back for installing a qualifying Level 2 charger, and some state programs go up to $1,500 or more for income-qualified households. California, New York, Colorado, and Massachusetts consistently offer some of the strongest programs.
Incentive claim sequencing matters. Collect your utility rebate first, then apply for any state program, then claim the federal 30C credit on your taxes. This order keeps your documentation clean and maximizes what you receive without double-counting.
Keep every receipt, the charger’s product documentation, and your electrician’s invoice. The IRS requires documentation of both the hardware and installation costs to validate the credit. A missing receipt is the most common reason a claim gets reduced.
Smart planning before the install is the single most effective way to lower your total cost. Most overspending happens because homeowners skip the assessment phase and go straight to scheduling an electrician.
Place the charger close to your panel. Locating your charger near the electrical panel cuts wire and conduit costs significantly. Even moving the planned location 10 to 15 feet closer can save $150 to $400 in materials and labor. If you have flexibility in where the charger goes, use it.
Choose plug-in over hardwired when it fits your situation. Plug-in Level 2 chargers using a NEMA 14-50 outlet are typically less expensive to install than hardwired units. Hardwired chargers cost $300 to $700 more in labor but provide a cleaner, more permanent installation. If you rent, plan to move, or want flexibility, a plug-in setup makes more financial sense.
Get a site assessment before purchasing anything. Skipping a thorough site and electrical assessment is the most common cause of inflated costs. An assessment costs little or nothing from a reputable electrician and tells you exactly what your panel can handle before you commit to a charger model or location.
Consider a load management device before a panel upgrade. Some smart chargers and add-on devices can monitor your home’s total electrical load and reduce charger output during peak usage. This approach can eliminate the need for a panel upgrade entirely in borderline capacity situations, saving $1,500 or more.
Pro Tip: The cheapest quote is not always the best deal. An electrician who skips the permit or skips the load calculation may cost you far more in corrections, fines, or failed inspections later.
The charger you choose directly affects both the hardware price and what your electrician needs to do. Understanding the difference between Level 1, Level 2, and smart chargers helps you match the right product to your actual needs and budget.
| Charger Type | Hardware Cost | Typical Install Cost | Charging Speed |
|---|---|---|---|
| Level 1 (120V, plug-in) | $0–$100 | Minimal, uses existing outlet | 3–5 miles per hour |
| Level 2 plug-in (NEMA 14-50) | $200–$500 | $300–$800 labor | 20–30 miles per hour |
| Level 2 hardwired | $300–$800 | $500–$1,500 labor | 20–44 miles per hour |
| Smart Level 2 (Wi-Fi, load mgmt) | $400–$800 | $500–$1,500 labor | 20–44 miles per hour |
Level 1 charging uses a standard 120V household outlet and requires no installation at all. The tradeoff is speed: you gain roughly 3 to 5 miles of range per hour. For drivers who add fewer than 30 miles per day, Level 1 is a legitimate option. For most EV owners, it is too slow to be practical.
Level 2 charging runs on a 240V circuit, the same voltage as your dryer or electric range. It delivers 20 to 44 miles of range per hour depending on the charger’s amperage. A 32-amp charger adds about 25 miles per hour; a 48-amp unit adds closer to 35 to 44 miles per hour. Higher amperage means faster charging but also requires heavier wire and potentially more panel capacity.
Smart chargers add Wi-Fi connectivity, app control, scheduling, and in some cases load management. The smart charging features that monitor your home’s total load can prevent nuisance tripping and may eliminate the need for a panel upgrade. The cost premium over a basic Level 2 unit is typically $150 to $300 in hardware. For most homeowners, that premium pays for itself quickly in avoided panel work and off-peak charging savings.
You can use the EV charger finder tool at Chargeprodirect to match a specific charger model to your panel capacity, garage setup, and daily driving needs before you buy.
Most homeowners pay $900 to $2,500 for a complete Level 2 EV charger installation, with panel upgrades and long wire runs being the two factors most likely to push costs above that range.
| Point | Details |
|---|---|
| Typical all-in cost range | Budget $900–$2,500 for most Level 2 home installs including hardware and labor. |
| Panel condition drives cost | About 30% of installs require panel work; a load calculation confirms whether yours is one of them. |
| Federal 30C credit saves up to $1,000 | Claim 30% of eligible costs via IRS Form 8911 to reduce your net out-of-pocket expense. |
| Charger location cuts wire costs | Placing the charger close to your panel can save $150–$1,500 in materials and labor. |
| Smart chargers can prevent upgrades | Load management features on smart chargers may eliminate the need for a costly panel upgrade. |
The single biggest mistake I see homeowners make is buying a charger before getting an electrical assessment. They pick a model they like, order it, and then call an electrician. That sequence almost always leads to surprises, either a panel that cannot support the charger they chose or a location that requires a 60-foot wire run nobody budgeted for.
The right sequence is the opposite. Assess your panel first. Identify the best charger location based on where your panel is. Then choose a charger that fits what your electrical system can actually support without expensive modifications. That order alone can save you $500 to $1,500 on a typical install.
I also think most people underuse the incentive stack available to them. The federal 30C credit is straightforward and worth up to $1,000, but many homeowners never check whether their utility offers a rebate on top of it. In states like California and Colorado, stacking a utility rebate with the federal credit can bring your net cost down by $1,200 to $1,800. That changes the math on the whole project significantly.
One more thing: do not let a contractor talk you into a full panel upgrade without seeing a load calculation. A surprising number of quotes include panel upgrades that are not actually necessary. The NEC 220.82 calculation is the standard tool for determining whether your panel has capacity. If an electrician cannot show you that calculation, their recommendation is not grounded in data.
For small business owners, the calculus is slightly different. Commercial installs involve higher amperage requirements, more complex permitting, and potentially multiple units. The cost per unit goes up, but so do the available incentives, including the commercial version of the 30C credit, which covers up to 30% with a higher cap. Plan for a longer permitting timeline and budget a contingency of at least 20% above your quote.
— Clarissa
Knowing your cost range is the first step. Choosing the right charger for your specific setup is the next one, and that decision matters more than most people realize.

Chargeprodirect takes a different approach than generic retailers. Instead of listing products and leaving you to figure out compatibility, the team helps you match a charger to your actual panel capacity, installation location, and daily driving habits. That guidance up front is exactly what prevents the costly mismatches described throughout this article. Browse the full selection of Level 2 chargers for home and commercial use or use the EV charger finder to get a personalized recommendation based on your specific situation. Free shipping and flexible payment plans are included on every order.
Most homeowners pay between $900 and $2,500 all-in for a Level 2 EV charger installation, including hardware and labor. Panel upgrades or long wire runs can push the total above $3,000.
Yes. The federal Section 30C Alternative Fuel Vehicle Refueling Property Credit covers 30% of eligible residential installation costs, up to $1,000 per unit, claimed via IRS Form 8911.
A simple install in an attached garage with a short wire run typically takes 1 to 3 hours. Complex installs involving panel work or long conduit runs can take 5 to 8 hours.
Not necessarily. About 30% of installs require some panel work, but the majority of homeowners need only a new circuit. A licensed electrician should perform a load calculation before recommending any upgrade.
The most cost-effective approach is to install a plug-in Level 2 charger using a NEMA 14-50 outlet located close to your electrical panel, then claim the federal 30C credit and any available utility rebates to reduce your net cost.