
Need Installation?
Book a licensed install
Book a licensed EV charger install

Size the circuit at 125% of your EV charger’s continuous amperage rating, then match the wire to that breaker using the 75°C ampacity column. A 32A charger needs a 40A breaker and #8 AWG copper. A 40A charger needs a 50A breaker and #6 AWG copper. A 48A charger needs a 60A breaker and #6 AWG copper (or #4 on longer runs). If you’re using a NEMA 14-50 plug instead of hardwiring, you’re capped at 40A continuous draw on a 50A circuit.
TL;DR:
- Using the correct breaker size involves multiplying the charger’s amperage rating by 1.25 and rounding up to the next standard size, with 48A chargers typically needing a 60A breaker.
- Wire gauge for most residential EV chargers is based on the 75°C ampacity table, with #6 AWG copper suitable for 40A and 48A circuits; longer runs may require larger gauges like #4 AWG.
- Voltage drop becomes significant beyond 50 feet, so for 48A chargers over 75 feet, upgrading to #4 AWG copper is recommended to maintain efficiency and safety.
- A NEMA 14-50 outlet limits continuous draw to 40A despite a 50A circuit, whereas hardwired setups do not have this limitation, influencing wire and breaker choices.
- Properly verifying wire type, conduit use, and actual distances before installation prevents common mistakes that can lead to inspection failures or reduced charging performance.
Every EV charger installation starts with one number: the charger’s continuous amperage rating. That single figure determines your breaker size, your wire gauge, and whether you can use a plug-in receptacle or need a hardwired connection.
The table below covers the most common EV charger outputs sold for home use, mapped to standard breaker sizes and copper or aluminum wire gauge using standard residential pairings. These use the 75°C ampacity column, which is what most residential EVSE terminals and breakers are rated for.
A few things jump out once you look at this chart closely. First, jumping from 40A to 48A output doesn’t change the copper gauge at all. Both land on #6 AWG at the 60A breaker level, though longer runs at 48A often push you up to #4 for voltage drop reasons (more on that shortly).
Second, notice that the wire gauge doesn’t scale in a straight line with amperage. That’s because ampacity tables account for how conductors dissipate heat, not just how much current they carry.
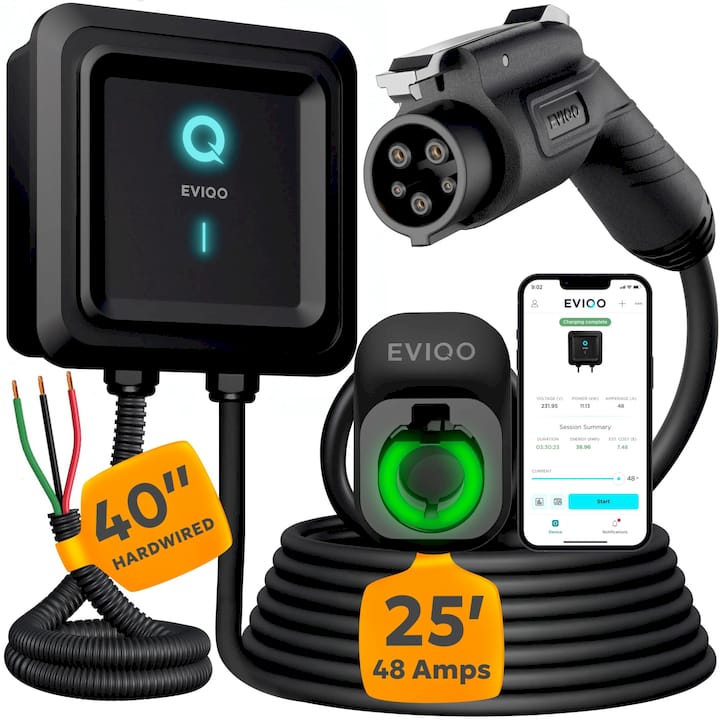
If you’re deciding between a plug-in and a hardwired setup, this is where it matters most. A NEMA 14-50 receptacle is typically wired on a 50A circuit, but NEC 625.40 limits the continuous draw through that receptacle to 40A, not the full 50A the breaker allows. Hardwired connections don’t carry that limitation, which is why a charger running at the full 48A must be installed as a hardwired unit on a 60A circuit rather than plugged into a 14-50 outlet.
The math behind every EV charger circuit comes down to one rule buried in NEC Article 625.42: electric vehicle charging equipment is classified as a continuous load, meaning it can run at full power for three hours or more without stopping. NEC 210.20(A) requires continuous loads to be sized at no more than 80% of the breaker’s rating, which flips around to the familiar 125% multiplier when you’re sizing the circuit for the load.
Here’s the formula:
Required circuit amperage = EVSE nameplate amps × 1.25
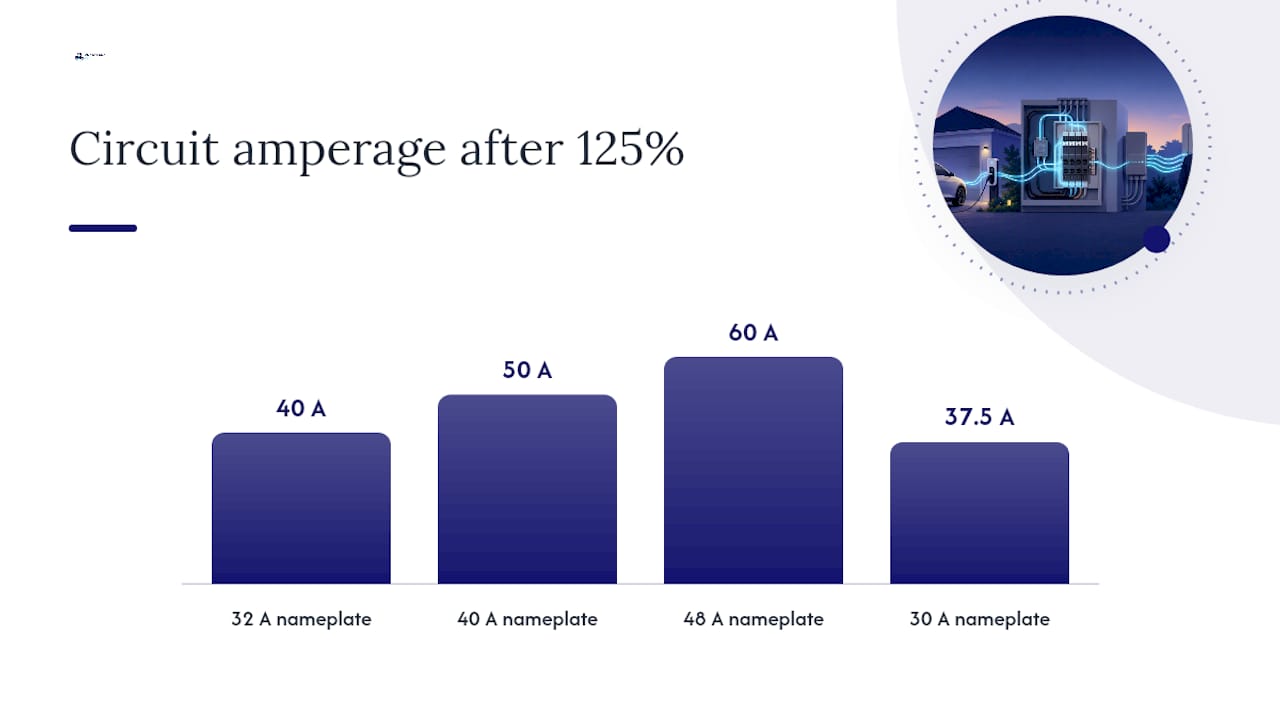
Once you have that number, NEC 240.6 tells you to round up to the next standard overcurrent protective device (OCPD) size, since breakers aren’t manufactured in every possible amperage.
Walking through three common examples:
Not every charger produces a clean number. A 30A charger, for instance, requires 37.5A of circuit capacity. Since there’s no 37.5A breaker made, you round up to the next standard size, which is 40A.
Once the breaker size is locked in, the wire selection depends on which ampacity table column applies. Residential EVSE circuits almost always use the 75°C column in NEC Table 310.16, since that matches the termination rating on most breakers and EVSE equipment sold for home use. Trying to use the 60°C column (common with older equipment or Romex terminations) forces you to a larger gauge for the same breaker size, which is a detail a lot of DIY guides skip entirely.
Code minimum wire gauge tells you what’s legal. It doesn’t always tell you what’s smart, especially once your run stretches past 50 feet from the panel to the charger. Voltage drop is the reason why, and it’s the single most overlooked factor in home EV charger installs.
The National Electrical Code doesn’t mandate a specific voltage drop limit for branch circuits, but the accepted industry recommendation is to keep voltage drop under 3% at full load. Go beyond that and you start losing charging speed, generating extra heat in the conductor, and shortening the useful life of the wire insulation.
Here’s how that plays out at 48A, the most popular Level 2 output on the market:
| One-Way Distance | Copper Gauge | Approx. Voltage Drop at 48A |
|---|---|---|
| Up to 50 feet | #6 AWG | Under 3% |
| 50 to 75 feet | #6 AWG (check drop) | Approaching 3% |
| 75 feet | #4 AWG | Under 3% |
| over 75 feet | #4 AWG or larger | Requires calculation |
The general guidance is that runs over roughly 40 to 75 feet at 48A start pushing #6 AWG copper toward that 3% ceiling, depending on your specific panel voltage and conduit fill. If your garage or driveway charging spot sits far from the main panel, plan on #4 AWG before you even pull permits.
The same logic applies at lower amperages, just with more room to work with. A 32A circuit on #8 AWG copper has more voltage drop headroom than a 48A circuit on #6, simply because there’s less current flowing through the same length of wire.
Pro Tip: Don’t estimate distance by eyeballing your garage. Measure the actual conduit or cable path, including every vertical rise up a wall stud and every turn through a header. A 35-foot straight-line distance often becomes a 55-foot actual wire run once you account for routing around framing and up into the attic.
If you’re going with aluminum conductors instead of copper (common on longer runs where copper cost becomes a factor), the rule of thumb is two AWG sizes larger for equivalent ampacity. A 48A circuit that calls for #6 copper needs #4 aluminum at minimum. Aluminum connections also demand anti-oxidant compound (often called noalox) at every termination point, and every lug needs to be torqued to the manufacturer’s exact spec listed on the device. Skipping either step is one of the most common reasons aluminum connections fail or overheat years down the road.
Aluminum also requires connectors and breakers explicitly rated for AL/CU use. Standard copper-only lugs on an aluminum conductor is a mismatch that inspectors will flag every time.
The cable type you choose changes the ampacity rules just as much as the gauge does, and this is where a lot of DIY installs run into trouble at inspection.
NM-B cable (Romex) is common in residential wiring and is allowed for many EV charger circuits, but it comes with a catch: NEC restricts NM-B ampacity to the 60°C column regardless of the conductor’s actual insulation rating. That means a #6 NM-B cable doesn’t get to claim the higher 75°C ampacity that a bare #6 THHN conductor would in conduit. For lower-amperage circuits like a 32A charger on #8 wire, this rarely causes problems. For a 48A or 60A circuit near the edge of what #6 copper can carry, it can matter a great deal.
THHN/THWN-2 conductors run through conduit are the preferred method for higher-amperage EVSE circuits, especially at 48A and above, and for any run that goes outdoors or underground. Here’s why installers lean this direction:
Conduit fill matters here too. A standard 3/4 inch EMT conduit comfortably holds three #6 THHN conductors (two current-carrying plus a ground) for most 48A to 60A installs, but check the specific fill tables before you buy, since insulation thickness varies by manufacturer.
Whichever cable type you choose, always verify the termination rating on your breaker and on the EVSE unit itself. If either component is only rated for 60°C, you have to size the wire to the lower rating even if the conductor itself is rated for 75°C or 90°C. This single detail trips up more DIY installs than any other part of the calculation. If your charger will sit exposed to weather, a properly rated outdoor enclosure for the disconnect or junction point keeps moisture away from terminations that are already working near their rated limit.
NEC Article 625 covers more than wire gauge. It also sets the safety and labeling requirements that inspectors check before signing off on your install.
One advanced wrinkle worth knowing about if you’re planning multiple chargers on one property: newer NEC provisions allow EV power management systems (EVPMS) to reduce required feeder sizing when the system actively limits how much current multiple chargers can draw simultaneously. This matters for households adding a second charger or a fleet operator wiring several bays off one panel. It’s not something most single-charger homeowners need to worry about, but if you’re planning for two or more vehicles charging on the same service, ask your electrician whether load management could avoid an expensive panel or service upgrade. Coordinating with your local authority having jurisdiction early avoids surprises at inspection, since amendments to Article 625 vary from one town to the next.
A methodical walkthrough before you buy a single foot of wire saves you from the two most expensive DIY mistakes: pulling wire that’s undersized for the actual run, and discovering your panel has no room left after the materials are already purchased.
Pro Tip: Buy a torque screwdriver before you start. Most homeowners have never torqued an electrical lug in their life, and “snug” by feel is almost always under the manufacturer’s spec. A $25 torque driver removes the guesswork entirely.
Here’s when to stop and call a licensed electrician instead of finishing the job yourself: if your panel is full and needs a subpanel or service upgrade, if you’re running aluminum conductors and haven’t worked with AL/CU terminations before, if your local jurisdiction requires a licensed electrician’s signature on the permit (many do for anything touching the main panel), or if the run involves boring through fire-rated walls or crawling through a finished attic. DIY wire pulling for an already-adequate panel is a reasonable weekend project. Panel work and service upgrades are not.
This guide draws on NEC Article 625 requirements and the published wire sizing references listed in the sources below. Use it to prepare for the conversation with your electrician, not to replace it. Your electrician and local permitting office have the final word on your installation.
The 125% rule gets repeated everywhere, and it should be. But most guides stop there, as if the math is the hard part. It isn’t. Multiplying by 1.25 takes ten seconds. What actually causes failed inspections and underperforming chargers is the stuff that comes after: measuring your real wire run instead of eyeballing it, knowing when NM-B’s 60°C ampacity limit quietly undercuts your 75°C conductor rating, and understanding that a 50A NEMA 14-50 receptacle doesn’t actually give you 50A of continuous charging.
If you take one thing from this guide, prioritize the run-length calculation before you buy wire. Code minimum and the right choice for your driveway are not always the same number, and voltage drop is invisible until your charger is running slower than it should for no obvious reason. A 48A charger on a 90-foot run deserves #4 copper, not the #6 that satisfies the bare code minimum.
The conventional advice treats every installation like a textbook 25-foot garage run. Real homes rarely cooperate that neatly.
Picking the charger is only half the job. Getting the wire and breaker right is what makes it actually work on install day, and Chargeprodirect built its EVIQO lineup so the amperage rating tells you exactly what you need before you order anything.
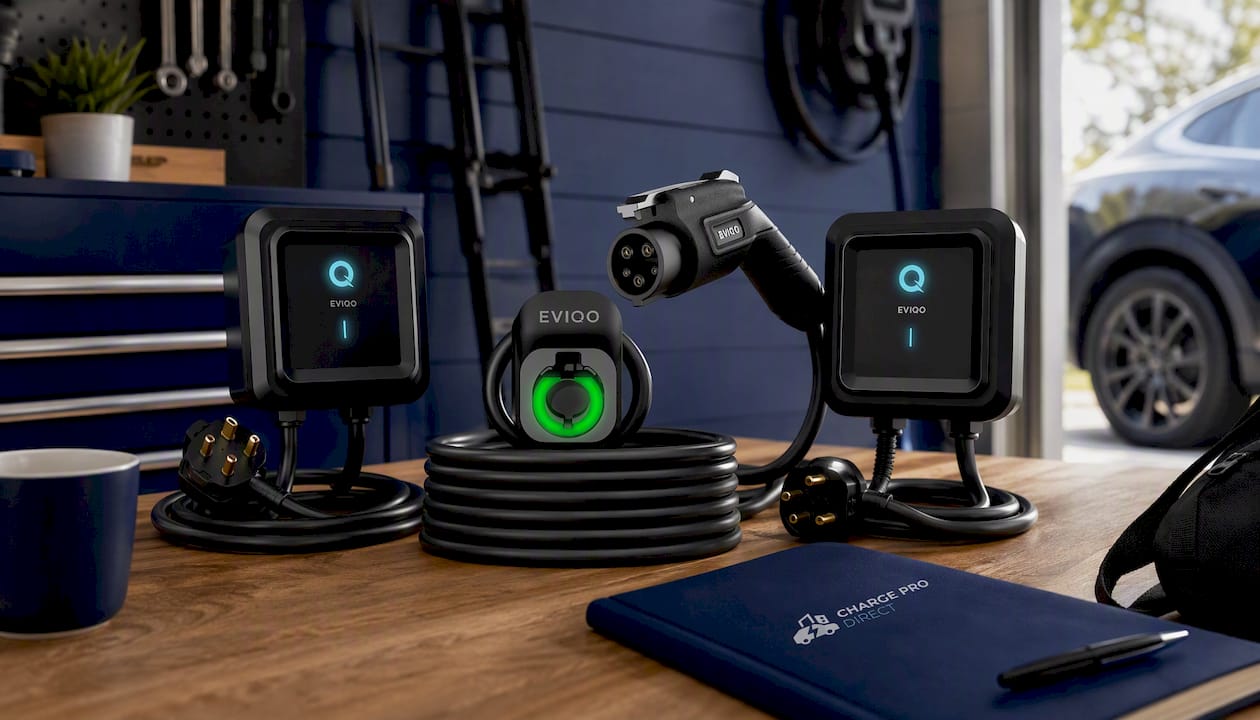
The EVIQO 48A hardwired charger pairs with a 60A breaker and #6 AWG copper (or #4 on longer runs), and skips the receptacle entirely for a cleaner, code-friendly install with no 40A continuous-draw cap to worry about. If your panel has less room to spare, the EVIQO 40A plug-in charger runs comfortably on a standard 50A circuit with #6 AWG copper, a common upgrade for homes already wired for a range or dryer outlet. Browse the full Level 2 charger lineup to compare specs side by side.
Chargers matched to your wire and breaker
Pick the row that matches the circuit your electrician is sizing.
50A breaker: 40A plug-in, NEMA 14-50
60A breaker: 48A hardwired
Not sure which fits your car and panel? Try the EV Charger Finder. Residential EV chargers ship free.
Code compliance isn’t something to take on faith from any single article, including this one. Cross-check your specific installation against a few reliable resources before you commit to a wire gauge.
The NYSERDA summary of NEC Article 625 walks through the code’s practical requirements for residential EVSE in plain language. For breaker and wire pairing calculators, both the EV charger wire size guide and the wire size reference for Level 2 chargers let you plug in your specific amperage and distance.
Local code amendments can override or add to the base NEC, so always confirm requirements with your city or county’s permitting office before pulling wire. What’s standard in one town might need an extra step in the next.
Most 240-volt EV charger circuits use 6/3 wire (two hots, a neutral, and a ground) if the EVSE unit needs a neutral, though many Level 2 chargers only require 6/2 with ground since they don’t use 240V split into two legs. Check your specific charger’s installation manual, since this varies by unit.
Yes, NM-B (Romex) is allowed for many residential EV charger circuits, but NEC limits its ampacity to the 60°C column regardless of the conductor’s actual rating, which can force a larger gauge than THHN in conduit for the same breaker size.
Yes, #6 THHN in the 75°C column is commonly used for both 40A circuits (50A breaker) and 48A circuits (60A breaker), making it one of the most common gauges in residential EV charger installations.
Only for a charger rated at 32A or less, since NEC 625.42 requires the breaker to be sized at 125% of the charger’s continuous rating; a 40A breaker is undersized for anything above 32A.
A 48A EV charger requires a 60A breaker and typically #6 AWG copper wire, though runs longer than roughly 40 to 75 feet often need #4 AWG copper to keep voltage drop under the recommended 3% threshold.


