
Need Installation?
Book a licensed install
Book a licensed EV charger install

A home solar panel system converts sunlight directly into electricity, reducing your utility bills from the day it goes live. Technically called a photovoltaic (PV) system, it uses semiconductor cells to generate direct current (DC) power, which an inverter then converts to the alternating current (AC) your home uses. Standards like the National Electrical Code (NEC) and IEC 62446 commissioning tests govern every installation, protecting your investment and your family. Understanding these basics puts you in a much stronger position before you talk to your first installer.
Solar installation is a governed, engineered process, not a simple rooftop mounting job. Homeowners often underestimate how many regulated steps sit between signing a contract and flipping the switch.
Here is the full sequence from start to finish:
Pro Tip: Ask your installer which permitting platform they use. Automated systems like SolarAPP+ can shave weeks off your project timeline and reduce administrative costs.

System size is the single most important variable in your solar investment. Get it wrong and you either overpay for capacity you never use or fall short of your savings goals.
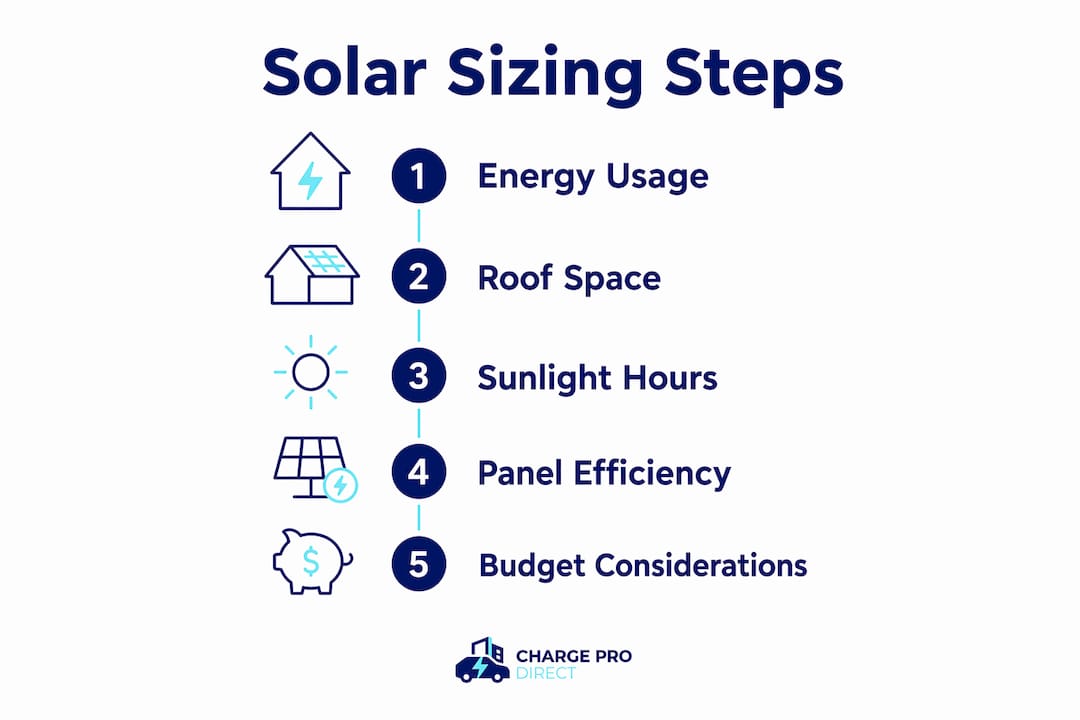
A typical residential solar system ranges between 5 and 10 kWp and requires roughly 18–40 individual panels. That wide range exists because every home is different. A 1,200 sq ft home with gas appliances needs far fewer panels than a 3,000 sq ft all-electric home with an EV in the garage.
Key factors that determine your system size include:
Pro Tip: Download your utility’s hourly usage data if available. Hourly data reveals peaks and patterns that monthly totals hide, giving your installer the precision needed for accurate sizing. Chargeprodirect’s battery sizing guide walks you through this process step by step.
The sticker price of solar panels is only part of the story. Soft costs including permitting, design, and administrative fees make up roughly two-thirds of the total project cost. That means hardware is actually the smaller portion of your bill.
Here is a breakdown of the main cost components:
| Cost Component | What It Covers |
|---|---|
| Solar panels | The photovoltaic modules themselves; price varies by wattage and technology (monocrystalline, bifacial, TOPCon) |
| Inverter | Converts DC to AC; string inverters cost less, microinverters cost more but perform better under shading |
| Racking and mounting | Hardware that attaches panels to your roof structure |
| Electrical work | Conduit, wiring, breaker panel upgrades, and meter connections |
| Soft costs | Permitting fees, engineering drawings, design work, and project management |
| Roof preparation | Replacement or repair if your roof needs work before installation |
Several factors can reduce your net cost:
One hidden cost many homeowners miss: if your roof needs replacement, do it before solar installation. Removing and reinstalling a solar array to replace a roof later adds significant labor cost to an already expensive project.
Your roof is the foundation of your entire solar investment. A structurally sound, well-oriented roof produces more energy and avoids costly rework down the road.
Key roof and site factors to evaluate before installation:
A thorough site assessment takes 1–2 hours with a qualified professional. Any installer who quotes you a system after a 15-minute walkthrough is skipping steps that matter.
A successful residential solar installation depends on precise system sizing, thorough site assessment, and understanding that soft costs make up the majority of your total project budget.
| Point | Details |
|---|---|
| Installation timeline | The full process takes 2–3 months; physical panel installation takes only 1–3 days. |
| System sizing | Most homes need a 5–10 kWp system with 18–40 panels; size based on your actual usage, not averages. |
| Cost structure | Soft costs like permitting and design make up roughly two-thirds of total project cost. |
| Roof readiness | Replace any roof over 15–20 years old before installation to avoid costly rework later. |
| Home value | Correctly installed solar systems add approximately $25,000 to a home’s resale value. |
Most homeowner questions center on panel brands and wattage ratings. Those details matter, but they are not where most solar projects go wrong.
The real risk lives in the site assessment and the commissioning phase. A system installed on a roof that needs replacement within a few years forces a full panel removal at the homeowner’s expense. A system can also pass a visual inspection but fail IEC 62446 insulation resistance tests, pointing to wiring faults that could cause fires. These problems happen when installers rush the engineering work to close deals faster.
Our advice: demand a written site assessment report before you sign anything. Ask specifically whether your installer runs all eight IEC 62446 commissioning tests and whether their design complies with the NEC. If they cannot answer those questions clearly, keep looking. The savings from going with the cheapest bid are not worth the risk of a poorly commissioned system on your roof for the next 25 years.
Precise energy usage analysis also pays off more than most homeowners expect. Homeowners who size their systems based on actual hourly consumption data consistently see better payback periods than those who rely on installer estimates built from regional averages. Pull your data, share it with your installer, and push back if the sizing conversation feels generic.
If you are already thinking about home solar energy, pairing it with an EV charger is one of the highest-return moves you can make. Charging your vehicle with power your roof generates brings your fuel cost close to zero on sunny days.

Chargeprodirect carries Level 2 EV chargers designed to work with residential solar systems, including the EVIQO 48A hardwired charger and the EVIQO 40A NEMA 14-50 plug-in model. Both are J1772 compatible and built for daily home use. Chargeprodirect also offers complete solar kits that bundle panels, inverters, and batteries for homeowners who want a single, coordinated solution. If you are not sure which charger fits your setup, the EV charger finder tool walks you through the selection in minutes. Residential EV chargers ship free, and flexible payment plans are available at checkout.
Physical installation takes 1–3 days for most homes. The full project from initial consultation to Permission to Operate typically runs 2–3 months due to permitting and utility interconnection steps.
A typical residential system requires 18–40 panels in a 5–10 kWp range. Your exact count depends on your energy consumption, roof orientation, and whether you are adding battery storage.
Yes. Homebuyers pay roughly $25,000 more for homes with correctly installed and inspected solar systems, making solar one of the few home improvements that directly boosts resale value.
Soft costs cover permitting, engineering drawings, design work, and project management. They make up about two-thirds of total residential solar project costs, which is why reducing them through automated permitting platforms can meaningfully lower your final bill.